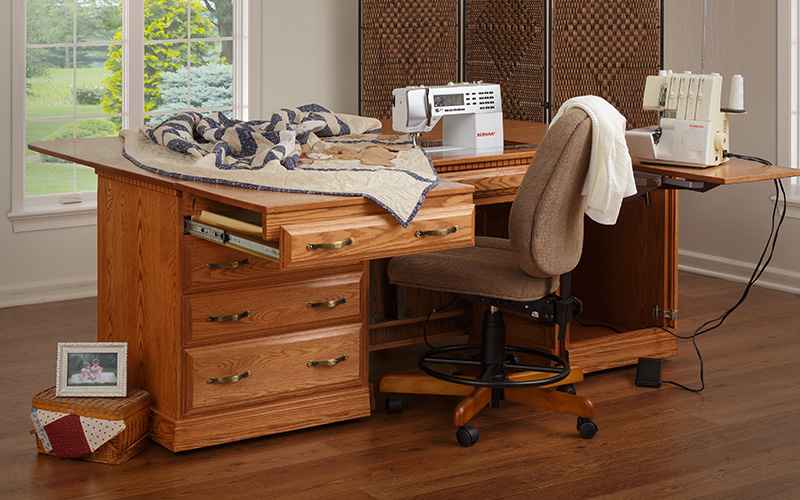
Are you tired of sacrificing valuable desk space or struggling with an uneven sewing surface? A sewing cabinet lift mechanism is the secret weapon of an organized sewist. For those who love crafting but hate clutter, this simple piece of hardware is a game-changer.
Cluttered work areas and machines that aren’t perfectly flush with the cabinet top can lead to fatigue and imprecise work. The solution? A quality sewing machine lift provides a heavy-duty, simple design solution for an effortless, professional setup.
This guide will walk you through the easy steps to operate and adjust your air lift, providing all the sewing cabinet lift instructions you need, and inspiring you to upgrade to a truly clutter-free workspace.
Mastering the Air Lift Mechanism
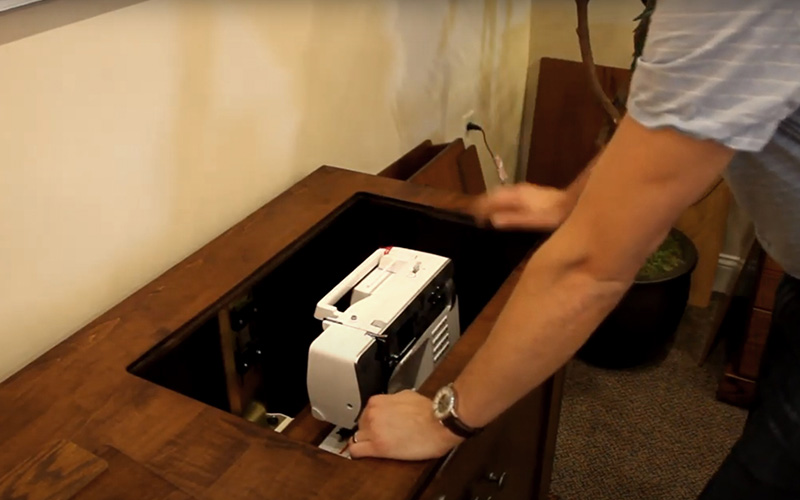
The heart of your cabinet is the sewing machine lift mechanism. It uses a push-release mechanism to easily move your sewing platform between three essential positions: Top (Flush), Middle (Access), and Bottom (Storage).
How the Push-Release Mechanism Works
The system operates using a simple push-to-release locking mechanism. Here are the steps to safely operate the platform:
- To Move the Platform Up (Storage to Flush):
- Push down on the platform until you hear the lock release with a distinct click.
- Let the air lift (or heavy-duty spring mechanism) gently guide the platform up.
- Stop at the middle position or let it come all the way up to the very top position, which is flush with the cabinet.
- To Move the Platform Down (Flush to Storage):
- Push down on the platform again until you hear a click.
- Crucial Step: Let it come up slightly. This motion resets the lock.
- You can now push the platform back down to the middle position (locking it in) or push it all the way down to the storage position.
Note: The lift’s capacity and internal hardware are designed for smooth movement, so you shouldn’t need to force it.
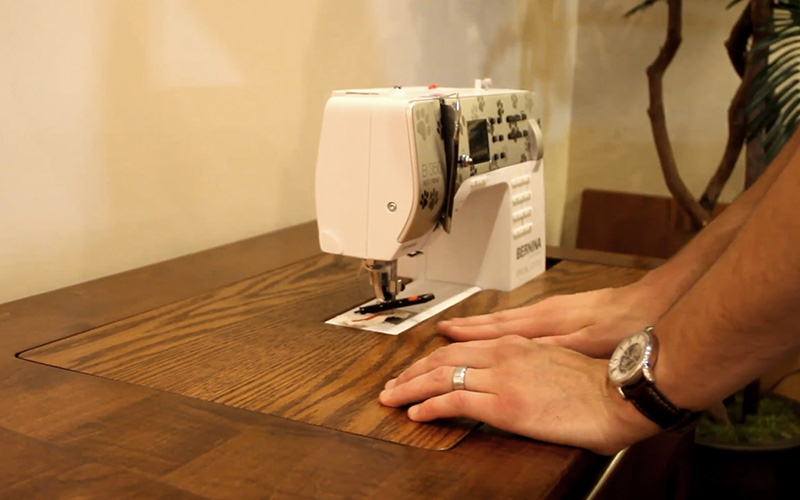
Adjusting Your Platform for the Perfect Fit
The most important step for comfortable sewing is making sure the arm of your sewing machine is exactly flush with the top of the cabinet. This allows you to work without dragging fabric over an edge.
This is the adjustment needed to ensure a truly seamless work area:
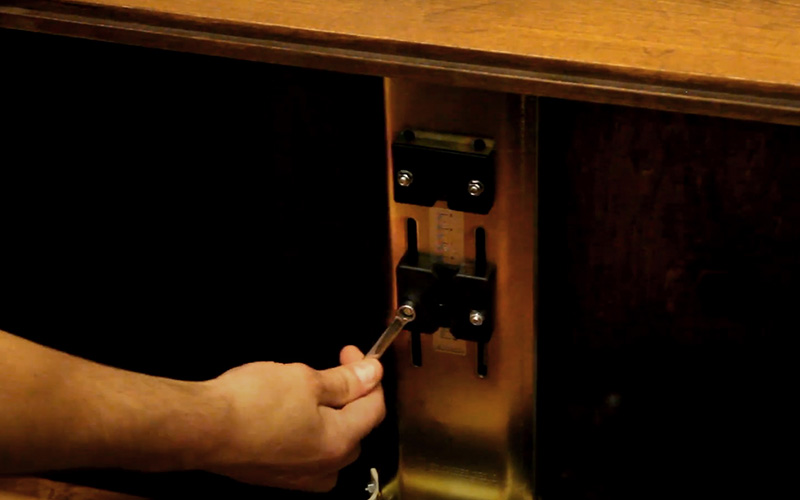
- Locate the Adjustment Hardware: You will be adjusting the black locking block located on the lift arm.
- Loosen the Nuts: To move the block, you must first loosen the two corresponding nuts. The wrench you need for this is a small, easy-to-use 8-mm wrench.
- Find the Sweet Spot: Once loosened, move the locking block up or down. The exact distance needed depends on your specific sewing machine.
- Secure the Lock: When the platform is perfectly level with the cabinet top, tighten the nuts firmly.
Because our lifts are heavy-duty and built for a high load capacity, this adjustment will securely hold your machine in place once set, ensuring you have that perfect center line and stability for years of sewing.
Achieving a Seamless, Professional Work Area
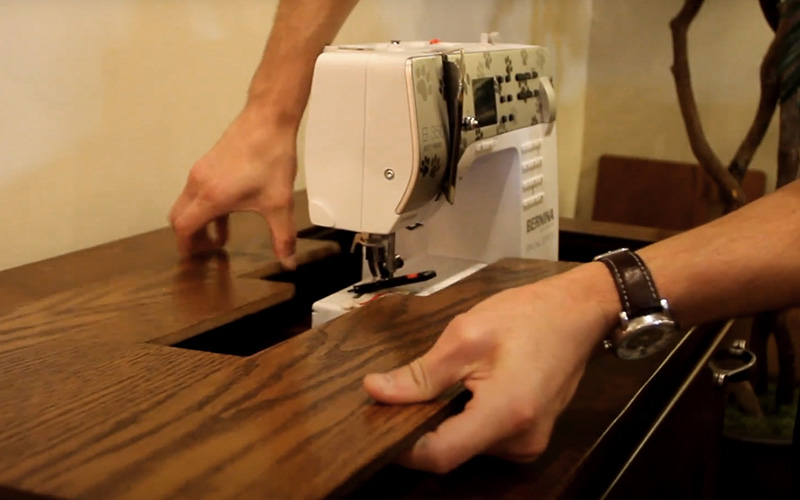
The true joy of a dedicated sewing cabinet comes with the addition of a custom insert. This small, specialized piece transforms your workstation from segmented to one smooth area to sew on.
Positioning a Custom Insert
- Position the platform to the adjusted “flush” height. The air lift does the work for you!
- A Note About Custom Fitting: For the insert to fit seamlessly around the arm of your machine, you will want to remove the storage compartment from your machine (if applicable).
- Take the insert and slide it down the arm of the machine. Now you have a nice, smooth, extended surface for your fabric, eliminating drag and supporting your largest projects!
This feature is the foundation of a professional, clutter-free workspace. Cabinets like our Mini Plus Sewing Cabinet or the large Sewing & Crafting Island are designed to maximize this seamless experience.
Storing Your Sewing Machine with Ease
When you’re finished sewing for the day, the last thing you want is a messy space. The final, most satisfying step is putting your machine away into the storage position.
To put your machine away:
- Press down to release the lock.
- Let it up slightly to reset the lock (this is key!).
- Push it all the way back down to the very bottom to lock it into the storage position.
Now, the machine is completely hidden away, and you reclaim your space! This cabinet lift and desk lift functionality is what makes our furniture so much more than just a table—it’s a commitment to a tidy, multi-purpose, clutter-free home.
Your Sewing Space, Elevated
You now know how simple it is to use the sewing machine lift instructions to operate and adjust your cabinet. From the easy push-release mechanism to the final clutter-free storage, your adjustable workstation is the key to producing your best work.
Don’t just sew—create in a space that inspires you. A quality sewing cabinet with a reliable air lift is the foundation for your best work.
Ready to stop struggling with clutter and start sewing in comfort?